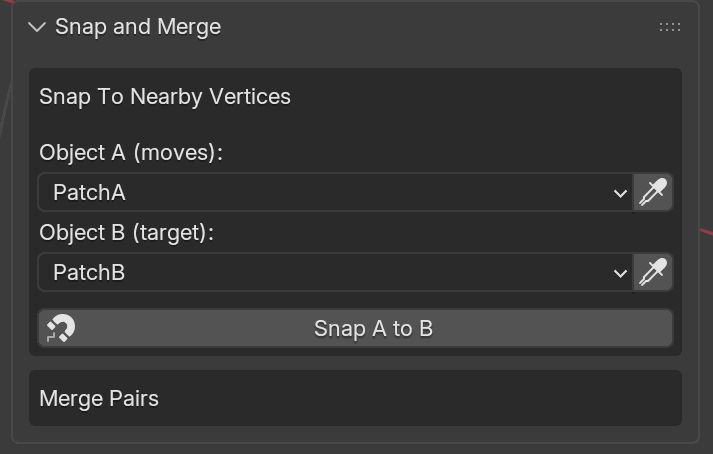
🧲 Snap and Merge
Two separate steps that work together:
Snap is a one-shot alignment: it translates object A in world space so that its closest vertex lines up with the nearest vertex on object B, leaving just enough contact gap to avoid interpenetration. In the same pass it also captures stitch anchors for every A-vertex within reach of B, not just the single closest one.
Merge is a solver-side soft stitch between two objects. At transfer time it becomes a cross-object stitch force that holds the two meshes together during the simulation. It is a force, not a weld: stitched vertices are pulled toward their targets but never share the same point, so a small contact gap always remains.
You typically snap and merge in sequence (the snap operator creates the merge pair automatically), but the two concepts are independent and can be used separately.
Important
Snap is a set-level operation, not a single-vertex operation. The feature is designed for meshes whose geometry already coincides (fully or partly) so that many A-vertices have a matching counterpart on B. A canonical example is duplicating a subdivided square patch and snapping the copy onto the original: every edge (or interior) vertex on the copy has a one-to-one counterpart on the original, so the whole set stitches in a single operation.
If only one isolated vertex on A happens to be close to B while the rest of the mesh is far away, only that one pair is recorded. The solver won’t magically stitch meshes whose topologies don’t align. Author the meshes so the intended stitch region coincides before snapping.

Snap records a stitch pair for every A-vertex already within B’s contact gap, and nothing else. Left: matching subdivided patches produce a full set of stitches in one pass. Right: a patch whose only one corner coincides with B yields a single stitch; the rest of the mesh stays unattached even after Merge. Author the meshes so the intended stitch region coincides before snapping.
Snap and Merge Panel
Open the sidebar (N) in the 3D viewport and switch to the add-on tab.
The Snap and Merge panel sits below Scene Configuration and
Dynamics Groups, and is collapsed by default. Click the header
to expand it.
When expanded, the panel contains a single box titled Snap To Nearby Vertices:
An Object A dropdown (the source; this is the object that will move) with an eyedropper button on the right for picking from the viewport.
An Object B dropdown (the target; this stays put) with its own eyedropper.
A Snap A to B button with a snap icon.
To snap two objects together, pick A and B with the dropdowns or eyedroppers, then press Snap A to B. The add-on finds the closest pair of vertices between A and B, translates A (in world space, parent-safe) so they line up, applies the contact-gap rules below, and records per-vertex barycentric anchor data for a later stitch. It also registers a merge pair automatically.
Snap and Merge panel with the two plane sheets below picked as A and B. PatchA is the one that will move (magenta); PatchB is the target that stays put (blue). Clicking Snap A to B runs the operator on whatever pair you’ve set here.
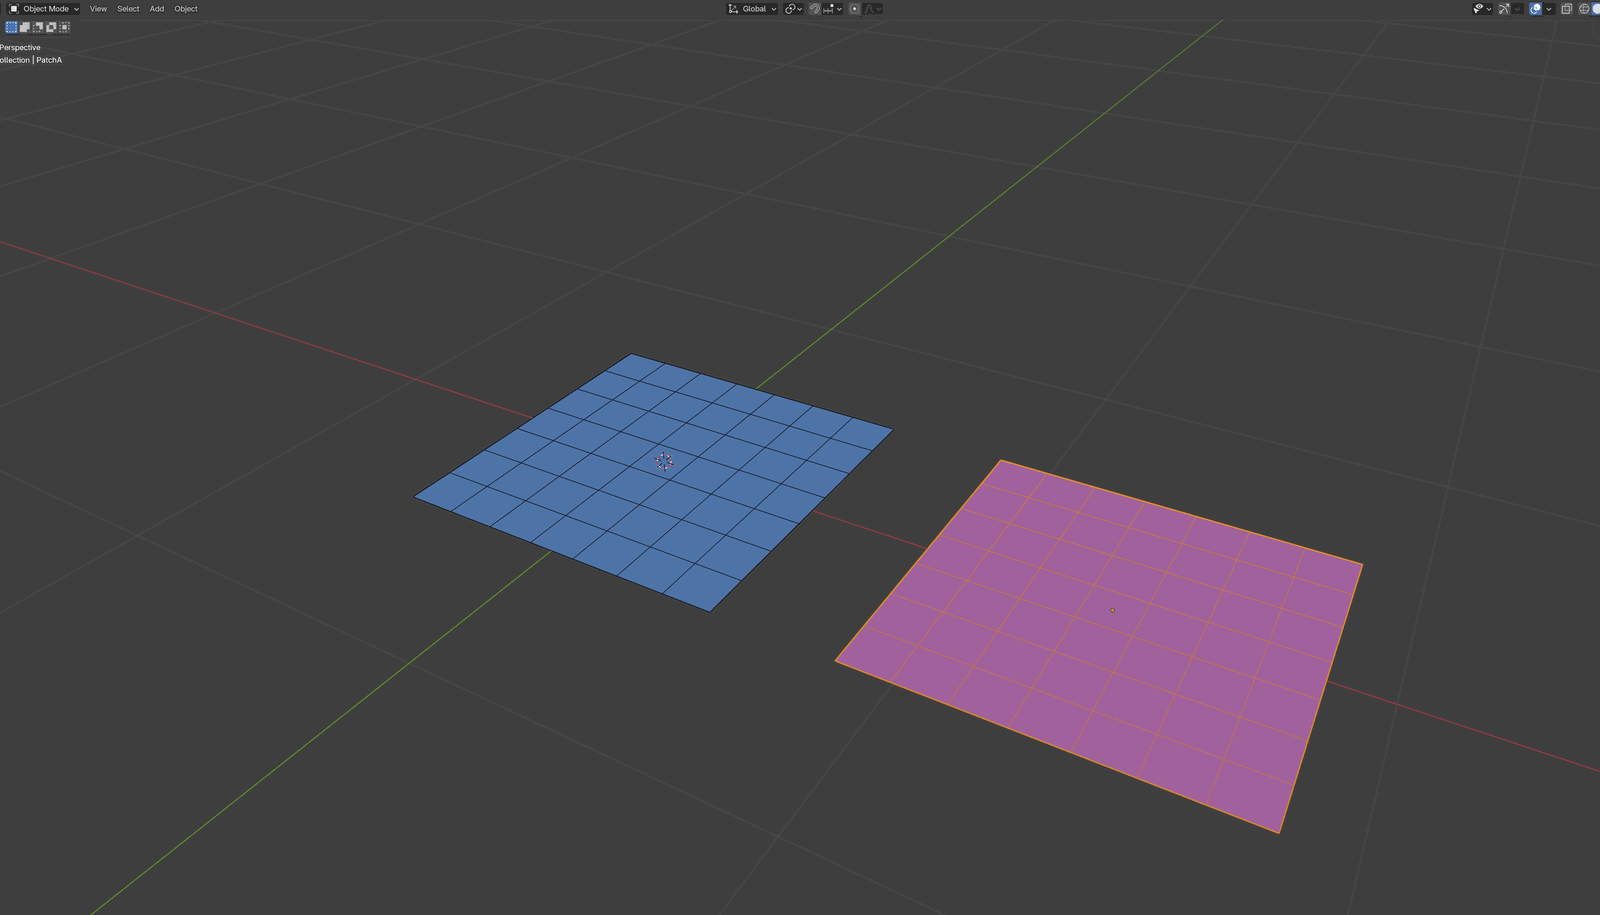
Before. Two identically-subdivided shell patches assigned to Shell groups: PatchB (blue, at the origin, stays put) and PatchA (magenta, shifted along the +X axis only; same Y, same Z). There is a clear gap along the shared edge; the two patches are not yet joined.
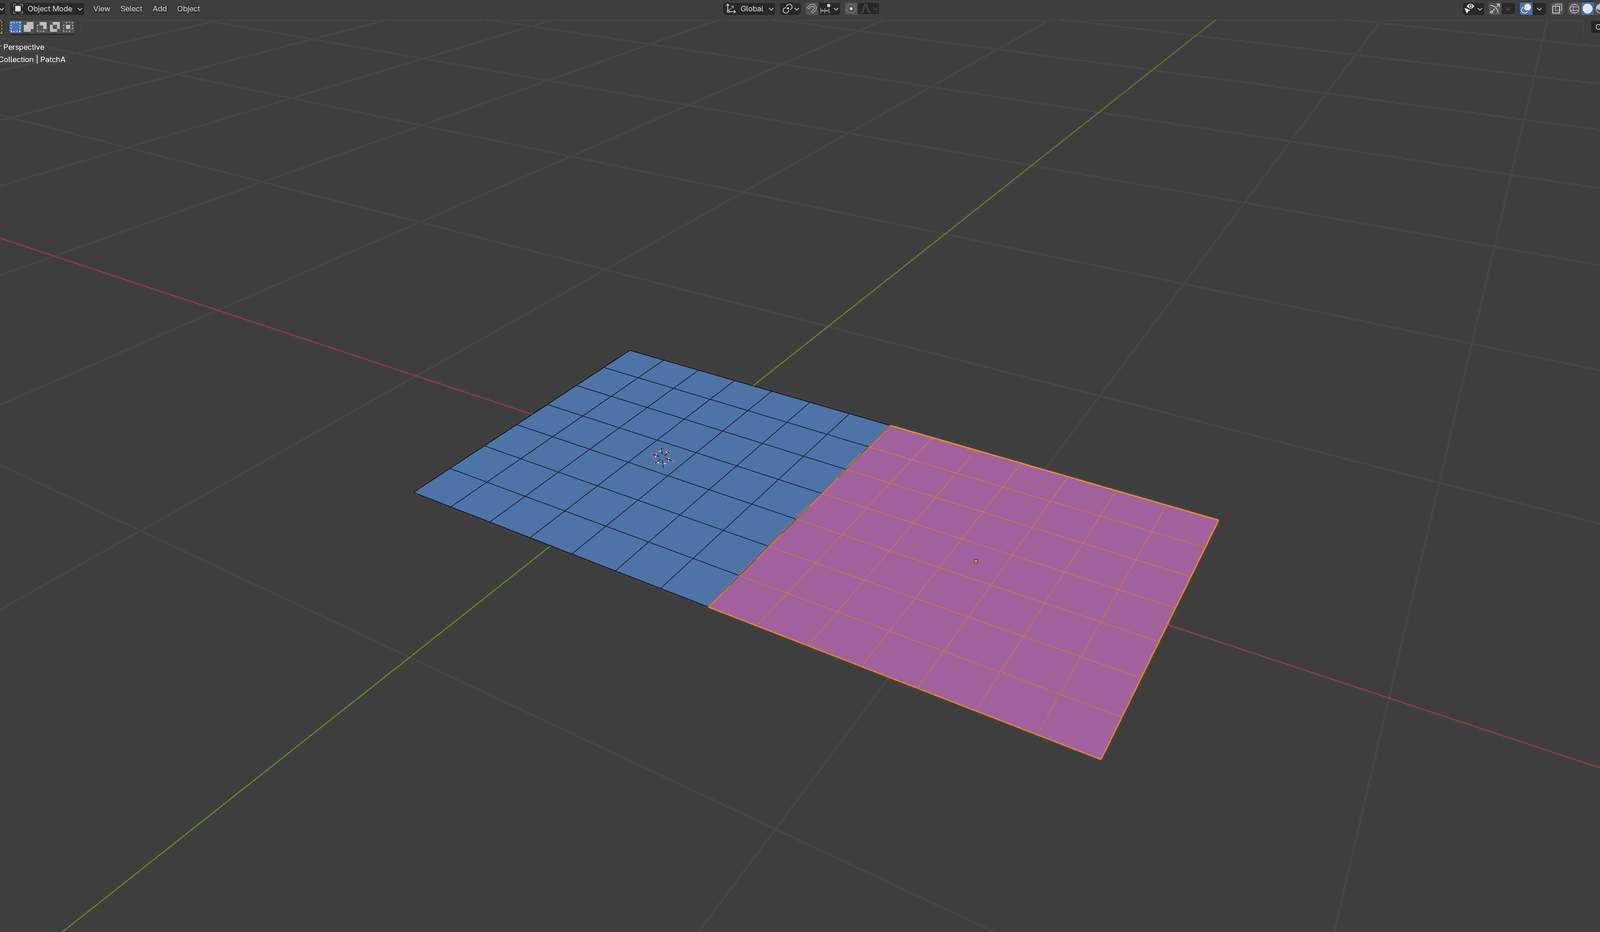
After Snap A to B. PatchA has translated along the X axis in
world space until its nearest vertex sits a small contact gap from
PatchB. The two patches are not welded: every seam vertex on PatchA
is tied to its counterpart on PatchB by a recorded soft stitch, and
the stitch force together with the contact barrier settle into
balance across that small gap, so the patches read as a single 2x1
rectangle while staying separate meshes. The merge pair is
registered automatically and the per-vertex stitch anchors are
captured behind the scenes.
As soon as at least one merge pair exists, a second box labeled Merge Pairs appears below the snap box, containing:
A UIList showing each pair, with both object names per row.
A Remove Merge Pair button below the list (disabled unless a row is selected).
A Stitch Stiffness slider, shown for every supported pair. All stitches are soft and mass-scaled, so the slider applies to Shell-Shell and Rod-Rod pairs the same way it applies to the Solid-involved pairs. Raise it to hold a seam together more firmly.
A separate Visualization panel further down the sidebar exposes a Hide all snaps toggle that hides or shows the merge-pair / stitch overlay in the viewport.
Gap Rules
The solver needs a small separation between the two meshes at rest, otherwise contact barriers start flagging penetration on frame 1. Because every stitch is a soft force rather than a weld, the snap operator always leaves a positive gap; stitched vertices are never coincident. The same rule applies to all supported pairs:
A type ↔ B type |
Applied gap |
|---|---|
Any supported pair |
The sum of both groups’ Contact Gap and Contact Offset values, plus a small safety margin so the closest pair starts just outside the contact band. |
Cross-Stitch Anchors
For every snap, the add-on also stores per-vertex barycentric anchor data on the resulting merge pair. Every A-vertex that ends up within a small reach-threshold of B after alignment becomes its own anchor, so a single snap typically produces many stitches, one per coincident vertex pair, not just one. Conceptually each source vertex is tied to a target triangle (or a single target vertex for rod pairs) with barycentric weights, so the stitch survives later mesh edits until the topology itself changes.
The reach-threshold is derived from the applied gap (a small multiple of it), which is why coinciding geometries work best: vertices that are already on top of each other are well within threshold, while distant vertices are ignored. You can see the captured set as yellow dots connected by thin yellow lines in the viewport overlay (toggle with Hide all snaps in the Visualization panel).
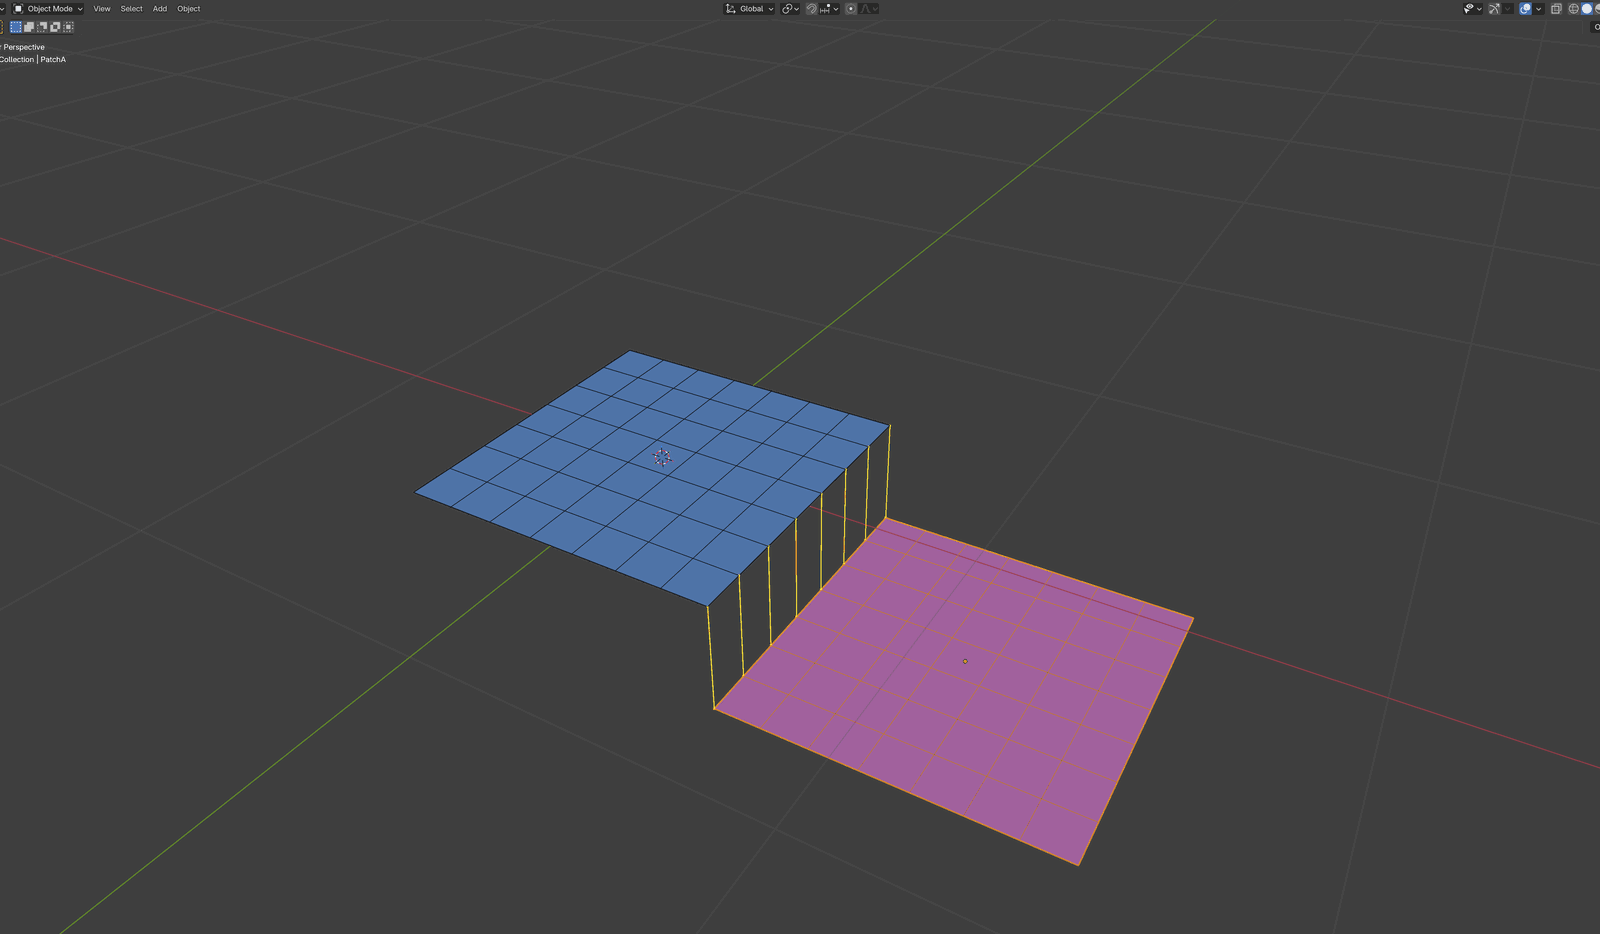
After Snap A to B, every A-vertex within reach-threshold of B
becomes a stitch anchor. For this X-axis-only shift, the entire
shared seam qualifies, so the overlay draws one yellow stitch per
seam-vertex pair. PatchA has been pulled straight down in Z after
the snap to make the pairs visible; the stitches themselves stay
tied to the original seam positions, separated by the small contact
gap rather than coincident.
Stitching to a Static collider
A dynamic Shell, Solid, or Rod can be stitched onto a Static collider, which lets you pin part of a moving mesh to a piece of fixed geometry (for example tacking a sleeve to a static mannequin panel). Pick the dynamic object as one side and the Static as the other, then snap as usual.
The Static side is treated as the target that stays put: snap never moves a Static collider, even if you set it as Object A. Instead, the dynamic object is the one translated into place, and the contact gap is left between them just as for any other pair. The stitch force then holds the dynamic mesh against the fixed surface during the solve.
Post Snap Exactly
Post Snap Exactly is a global toggle (not per-pair), found below the Merge Pairs box. It is on by default.
Because stitches are soft forces, the simulated result keeps a small contact gap at every seam. When Post Snap Exactly is on, fetching a frame moves each stitched vertex exactly onto its stitch target, so seams read as fully joined in the viewport. When it is off, the raw simulated gap is kept, showing the true soft-stitch separation between the parts.
The toggle applies to all stitch pairs at once, and it only affects what you see after fetching; it does not change how the solver computes the simulation.
Merge Pairs Without Snapping
A merge pair alone (without snapping) registers two objects as stitched during the solve. Each pair has:
UI label |
Python / TOML key |
Description |
|---|---|---|
Object A / B |
|
The two mesh objects. |
Stitch Stiffness |
|
Per-pair stiffness of the soft stitch force. Shown for every supported pair; raise it to hold the seam together more firmly. |
Show Stitch |
|
Overlay toggle for the viewport stitch preview. |
Merge pairs referencing deleted or unassigned objects are cleaned up automatically as the scene updates.
Blender Python API
The same workflow is available from Python:
from bl_ext.user_default.ppf_contact_solver.ops.api import solver

# Make the shirt hug the mannequin at its closest pair of verts, with the
# right contact gap for the SHELL <-> STATIC pairing. Also registers a
# merge pair with cross-stitch anchor data.
solver.snap("Shirt", "Mannequin")

# Or register a merge pair without moving anything.
solver.add_merge_pair("Shirt", "Mannequin")

# Iterate existing pairs.
for a, b in solver.get_merge_pairs():
    print(f"{a} <-> {b}")

# Remove a specific pair, or all of them.
solver.remove_merge_pair("Shirt", "Mannequin")
solver.clear_merge_pairs()
Note
Snapping and merging both reject library-linked (non-writable) objects because the solver needs to persist UUIDs on them. Make them local first if you hit that error.
Under the hood
What Snap does
Snap is a one-shot alignment:
Finds the closest pair of vertices between objects A and B.
Translates the moving object in world space (parent-safe) along the approach direction so the closest pair ends a small positive gap apart: the summed
contact_gap + contact_offsetof both groups, scaled by a safety factor (1.1x) plus a tiny floor so the pair starts just outside the contact barrier’s activation band and never coincident. A Static collider is never the moved object; the dynamic side moves instead.Records per-vertex barycentric anchor data for every A-vertex close enough to B to participate in a stitch (within a small multiple of the applied gap).
Cross-stitch anchor data
Each merge pair carries the captured anchor payload:
Source and target object UUIDs.
Per source vertex: target triangle indices and barycentric weights
[1.0, α, β, γ].Target positions at snap time.
Vertex counts at snap time, so stale entries can be detected if you edit the topology later.
When the pair is sent to the solver, the target vertex with the highest barycentric weight is picked per stitch. For rod-to-rod / rod-to-shell the target degenerates to a single vertex with weight 1.
Merge-pair encoding
Merge pairs are tracked by UUID, so renaming either object preserves the link. Pairs referencing an object that has never been snapped or merged (no UUID yet) are skipped at transfer. An empty cross-stitch payload means snap has not run or the pair is not eligible for a stitch.